How to Turn a Webinar Into Clips People Watch
A webinar recording usually gets one email and a replay page. This guide shows how to record with clipping in mind, pick the moments worth posting, keep slides legible in short video and spread the clips across a month.


How to Turn a Webinar Into Clips People Watch Features
Why the replay is not enough
A webinar takes weeks of work: the topic, the slides, the speaker prep, the promotion. Then most of that effort lives in a single replay link that a small share of registrants ever open. The recording itself is the most valuable asset the event produced, and it is usually the least used.
Clips change that. A 45-minute session typically contains a handful of moments that stand on their own: a sharp takeaway, a demo payoff, a well-answered question. Cut out and captioned, those moments can promote the replay, feed your social channels for weeks, give sales something to send after a call, and tease the next event. The process below works whether you run one webinar a quarter or one a week.
Before the webinar: record so it clips well
A few decisions made before you go live make the recording far easier to repurpose.
- Keep the speaker's camera on. Clips with a face hold attention better than slides alone, and a camera feed lets the clip cut between the presenter and the screen.
- Use large slide text. Anything readable only at full screen will be unreadable in a vertical clip. Fewer words per slide, bigger fonts, high contrast.
- Say audience questions out loud. When the moderator reads each question before it is answered, the question lands in the recording and the transcript, which turns the Q&A into ready-made clips with a built-in hook.
- Pause between sections. A beat of silence between topics gives you clean places to start and end clips.
- Keep the original recording file. Many meeting tools offer a higher-quality downloadable recording than the replay page streams; keep that file, since clipping starts from the file, not a replay link.
What our creator community is saying
Step 1: Find the four kinds of webinar moments
Webinar clips tend to come from four places, and it helps to look for each one deliberately.
Takeaway statements. The sentence where the speaker distills a point: "If you only change one thing, change your onboarding email." These are the most reusable clips because they deliver value in 20 to 40 seconds.
Demo payoffs. Not the whole walkthrough, which is too long and too dependent on context, but the moment where the result appears: the report generates, the automation fires, the before becomes the after.
Q&A answers. Each question from the audience is a hook someone actually wanted answered. A crisp answer to a common question is often the best-performing clip of the whole event.
Stories and customer examples. A specific example with a name, a number and an outcome makes an abstract point concrete and memorable.
To apply a quick quality check to each candidate, the guide to finding viral moments gives a five-point test: hook, clarity, emotion, value and trend.
Step 2: Keep slides readable in short video
The hardest part of clipping a webinar is the screen. A vertical crop centered on the presenter loses the slide, and a crop centered on the slide loses the person. Three framing options solve most cases.
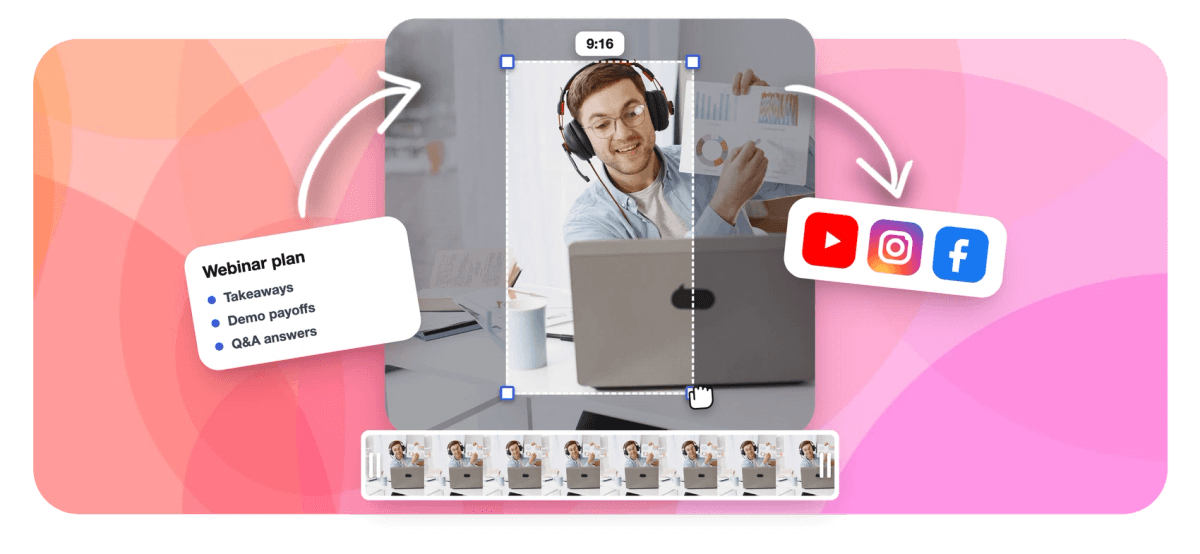
- Presenter plus slides. Stack the shared screen on top and the speaker below, so both are visible in a 9:16 frame. This is the default for demo and slide-heavy moments.
- Follow the speaker. For takeaway statements and stories, where the slide adds little, frame the presenter alone and let captions carry the words.
- Square or 4:5 for professional feeds. On LinkedIn and similar feeds, a 1:1 or 4:5 frame keeps more of the slide than 9:16 while still taking up more of the screen than landscape.
Step 3: Caption and title every clip
Webinar clips are mostly watched in professional feeds and inboxes where video plays silently by default, so captions are not optional. Word-timed captions, where each word appears as it is spoken, read more easily than static subtitle blocks. Keep them clear of the slide area, which is another reason the presenter plus slides layout helps: captions can sit over the speaker half of the frame.
Add a short title overlay at the top of each clip that states the point in plain words, such as "The one onboarding email to fix first". It works as the hook for muted viewers and doubles as the post text.
Step 4: Decide where each clip goes
Different clips suit different destinations. Plan this before you export so you cut the right aspect ratios.
- LinkedIn and professional feeds: takeaways and Q&A answers, in 1:1 or 4:5. See LinkedIn video clips for the format details.
- YouTube Shorts, Reels and TikTok: the punchiest takeaway or story, in 9:16, ideally under 60 seconds.
- Email nurture: a thumbnail and link to a 60 to 90 second clip that answers the question your segment cares about.
- Sales follow-up: the demo payoff or the Q&A answer that matches an objection a prospect raised.
- The next webinar's promotion: a teaser clip of last session's best moment, posted with the new registration link.
Step 5: Release the clips over weeks, not a day
Posting every clip the day after the event wastes most of them. A simple plan for a single webinar: in week one, post the strongest takeaway and the best Q&A answer and send the replay email with a clip embedded; in weeks two and three, post one clip each week to each channel; in week four, use a teaser clip to promote the next event. One recording covers a month of content without anyone filming anything new.
Common mistakes when clipping webinars
- Clipping the agenda slide. The first minutes of most webinars are housekeeping. Skip them unless the host opens with a strong claim.
- Cutting the whole demo. A ten-minute walkthrough is not a clip. Find the 40 seconds where the result appears and lead with it.
- Losing the question. A Q&A answer without its question is confusing. Keep the question in the clip, or restate it in the title overlay.
- One aspect ratio everywhere. A 9:16 clip posted to a professional feed wastes space, and a landscape clip in a Shorts feed looks tiny. Export per destination.
- Forgetting the replay link. Every clip is an ad for the full session. Put the replay or next registration link in the post text.
Doing it in EchoWave
You can apply every step above by hand in any editor, but the slow parts, finding moments and reframing slides, are where software saves the most time. In EchoWave's webinar to clips workflow, you upload the recording and pick the Webinar genre preset, which leans detection toward demos, takeaways and Q&A. The analysis plays out on screen, frames read with faces tracked, waveform, scene cuts and transcript, and ranked clips arrive with captions, titles and hashtags already drafted.
The engine is screen-share aware, so slide sections get the presenter plus slides layout automatically, and slide changes count as scene cuts that the camera never pans across. To pull a specific moment, type a prompt such as find moments about pricing, or ask Echo, EchoWave's AI editor, for "the answer about SSO from the Q&A". Echo also handles batch notes like making every clip square for LinkedIn. Clip jobs are shared across your workspace, and teams that run webinars on a schedule can start jobs automatically through Zapier or the REST API.

About the EchoWave team
EchoWave is a browser-based video and audio editor built by Lemon Vault LLC since 2018. The people who build the editor write these guides and test every step in the production app before publishing.
Webinar repurposing FAQ
How do you repurpose a webinar recording into short clips?
Download the webinar recording as a file, then pick the moments worth clipping: takeaway statements, demo payoffs, answers from the Q&A and specific customer examples. Trim each to one complete point, frame slide-heavy moments with the shared screen on top and the speaker below, add word-timed captions and a short title overlay, and export in the aspect ratio each channel needs. An AI tool like EchoWave can find, frame and caption the candidates for you, leaving you to choose and polish.
How many clips can you get from a one-hour webinar?
It depends on how the session was run. A webinar with a clear structure, a live demo and an active Q&A often yields six to ten usable clips; a slower session with long slide narration might yield three or four. The Q&A is usually the richest section, because every question is a ready-made hook. Aim for the clips that pass a basic quality test rather than a quota, since a few strong clips outperform many weak ones.
How do I keep slides readable in a vertical webinar clip?
Use a stacked layout: the shared screen on the top half of the 9:16 frame and the presenter below. That keeps the slide large enough to read while still showing a face. For moments where the slide adds little, frame only the speaker and let captions carry the words. If the clip is headed for LinkedIn or another professional feed, a 1:1 or 4:5 frame keeps more of the slide visible. Large slide fonts during the live session make all of this easier.
What is the best length for a webinar clip?
Most webinar clips work best between 30 and 90 seconds. A single takeaway statement can land in 20 to 40 seconds, a Q&A answer usually needs 45 to 90 seconds to include the question and the full answer, and a demo payoff needs enough setup for the result to make sense. For YouTube Shorts, Reels and TikTok, staying under 60 seconds is a safer default. Let each clip end right after its point lands.
Where should I post webinar clips?
Match the clip to the channel. Takeaways and Q&A answers suit LinkedIn and other professional feeds in square or 4:5. The punchiest moment can go to YouTube Shorts, Reels or TikTok in 9:16. Longer answers work well in nurture emails as a thumbnail linking to the clip. Sales teams can send the demo payoff or a relevant answer after a call, and a teaser of last session's best moment helps promote the next webinar.
Should webinar clips have captions?
Yes. Webinar clips are mostly watched in feeds and inboxes where video plays muted, so without captions most viewers miss the point entirely. Word-timed captions, which show each word as it is spoken, are easier to follow than static subtitle blocks. Place them over the speaker rather than the slide, and add a short title overlay at the top that states the clip's point, which serves as the hook for anyone scrolling with the sound off.
Can AI find the best moments in a webinar recording?
Yes, and webinars suit it well because their value is mostly in what is said. EchoWave reads the word-timed transcript alongside speaker turns, scene cuts and audio energy, and its Webinar preset leans toward takeaways, demos and Q&A. Each candidate gets a 0 to 100 Viral Score with Clarity and Value sub-scores and a written reason. You can also search the recording by topic or ask Echo, the AI editor, for a specific answer you remember from the Q&A.
Do I need to connect my webinar platform to make clips?
Not with EchoWave. It works from the recording file, or a direct media link, so there is no bot joining your session and no account connection to your webinar or meeting platform. Download the recording after the event and upload it. Teams that run webinars regularly can automate the handoff with Zapier or the REST API, starting a clip job when a new recording lands in a watched folder and collecting the ranked clips when the job finishes.
One webinar a month of clips
Find takeaways, demos and Q&A answers, framed with slides and captioned for muted feeds.
Get Started →